Friday, July 30, 2010

Creative bike hacking in Massachusetts - AtomicZombie.com

Hello Kathy and Brad,
 
I am so glad I found your site last year - I found it both inspiring and empowering. Since then, what followed was building a bicycle shed, that I call Neighborhood Bicycle Resource Center (in downtown Amherst, MA), and several bikes I am sending some pictures of here.

I have been biking mostly as a commuter for 15 years now, and since over three years I don't have a car (even before that I only shared one). That helps me to turn more resources toward biking as my exclusive mode of transportation over 1/2 mile distance.

Some of the pictures probably work without comment, but I include them here in case:


1) Neighborhood Bicycle Resource Center, or Beston Bicycle Barn (of Beston Street in Amherst): I believe the next twenty years will be utterly different in our lives, than the last twenty years, so BBB is to promote bicycling in my neighborhood by helping neighbors encounter and try out a variety of utilitarian (and even fun) bikes, and be able to fix them up themselves.


2) Old recumbent I screwed together 15 years ago from a single regular bike that I chopped up beyond recognition. The seat is so comfortable, that I will use it for a welded recumbent I am working on now.


3) Upright hand cycle: I built this as a prototype for a recumbent hand cycle to come, but it turned out so well, that I have been using it for a three mile (one way ) commute for four months now. My arms and shoulders expanded considerably since. (couldn't weld, as the gooseneck is aluminium, the rest is steel).


4) Tandem bicycle: my first larger welding job. Simple, strong and sweet.


5) Recumbent: from a child's bike (that frame was lighter than the BMX frame I could also have used), that Marianne is riding happily.

My plans are now: a road warrior for better winter commuting (currently I use a regular hybrid bike with studded tires) and a convertible recumbent-style spin cycle/low racer, as seen in Bicycle Builders' Bonanza, but maybe with a hand-cycle attachment.

Thank you for the excellent work and for the inspiration!

~  Gabor, Amhert, MA

Amazing stuff, Gabor. Thanks for sharing your story and pictures. Hope it will inspire others, too.


Viking recumbent tandem trike Canadian style

Here's a pic of my completed Viking recumbent tandem trike Canadian style.


~  Mike Walsh, Kingston, Ontario, Canada

 The Viking is a very unique tandem trike that includes an independent transmission system that allows one rider to stop pedaling without affecting the other. The Viking Tandem Trike uses commonly available 20mm disc brake hubs, so there are no hard-to-find or overly expensive components needed. The frame is completely made of square steel tubing, and everything else on the Viking Trike can be found at bicycle shops or hacked from scrap bicycles.

The building process is designed to allow anyone with a Do-It-Yourself desire to finish his or her own version of the Viking Trike without requiring previous bike building experience or specialized tools and skills. The plan is laid out in a format that makes customization or alternate parts usage a breeze, so you will certainly be able to include your own imagination in the process of building a recumbent trike.

If you have been eying up those expensive imported tandem trikes, but think $8000 is a bit too steep of a price tag, then get out your tools and build it yourself! For thousands of dollars less than the price of a basic tadpole trike, you can create your very own tandem trike that will rival many of the factory built machines available.

Wednesday, July 28, 2010

Recumbent bikes and trikes from Slovakia

Someone really likes to build bikes. Keep up the great work, Pavol!

Hello. For the bikes gallery - my homemade bikes.   ~ Pavol Kubricky,  Slovakia


Monday, July 26, 2010

Mike's first homebuilt bike - StreetFox recumbent tadpole trike


Thank you Brad and Kat for your hard work.  ~ Mike Gilkison, Lexington, Kentucky

Looking  great, Mike. Didn't take you very long to build it. Nice job on your first homemade bike!

Friday, July 23, 2010

My Motorized from scratch Streetfox Recumbent Tadpole Trike


Here are some more photos of the finished StreetFox. Thanks Atomic Zombie guys and gals for putting the idea in my head.

It's been fun building and it sure is an attention getter. I'm getting tons of questions about it everywhere I go and it really is a blast to ride.

It handles better than any sports car I've driven and what is really cool is I get lots of exercise pedaling and I go farther on this than if I had no engine on it.


The addition of the bike engine from GoldenEagle really makes this a viable mode of transportation. I will be riding it more than driving my car for sure especially if gas goes higher again.


Plus, I ride the back roads and get around all the traffic jams. ~  StevefromOH

Atomic Zombie Builders Gallery update - over 1,100 and growing!

More recumbents, choppers, trikes, tandems, motorized bikes, tall bikes, trailers, crazy/fun bikes, kids' bikes and more.

There are over 1,100 in the Builders Gallery - great stuff, everybody!

The updates were added as of Tuesday, July 20. Another update will be online next week, so get those pictures in soon!

Visit http://www.atomiczombie.com for more info. on submitting a picture of your completed bike project for the gallery.

Marauder recumbent lowracer build blog - AtomicZombie.com builders forum

I've been out giving this bike a good testing and will do a report in due course.

I'm finding a few minor things I need to do. One of these was to adjust the pedal position out a bit. Easily done. Another is to alter the handlebar's. I'm not quite satisfied but can't yet decide what I want to do. I want to lower them but then they need to be closer to miss my knees and they are too close anyway for my liking. Decisions decisions.

One decision I had to make was what to do about the long length of chain flopping about and the noise from the chain guide (ie., derailleur), No matter what I did it would rub or move because I had it mounted with the guide pulley bolt.

This all came to a head when one of the little idlers disintegrated while out on a ride. I don't think burning off roadies had anything to do with it but maybe it was the punishment for that.

Anyway I decided to go with simplicity and use a chain tube. I've had good luck with them.
The photos shows the result. It is quiet, doesn't seem to rob any detectable power and has stopped the chain shaking all over the place. I think it is a considerable improvement on what I had before and looks a lot neater.

~  John Lewis


Read more of John's Marauder build blog:  http://forum.atomiczombie.com/showthread.php?t=2116


The Marauder is a lean and mean racing machine guaranteed to make you feel as though you are piloting a human powered jetfighter! The Marauder is a chameleon, with the ability to adapt to the cycle track, as well as the urban landscape. Because of the long wheelbase and smooth suspension, the Marauder offers a very smooth and well-behaved ride on practically any style of terrain.

The Marauder is a great way to get an intense workout and show off your building skills. Because the design is based on common bicycle parts, you won't crash your budget, and can be riding it in a few weekends. There is plenty of room for modifications, and the Marauder makes a great platform for experimenting with aerodynamic fairings or electric power.

Every step of the build is detailed using high resolution photos, complete explanations of how each part of the vehicle works, and tips on how to customize the design. Even if you have never taken a hacksaw to a bicycle, you will be able to follow along and complete the build. Read more...

Thursday, July 22, 2010

Foldable Warrior/Street Fox hybrid

I am the newbie here.  I have started building a foldable trike. I took some ideas from the warrior but I will not mess with the under the seat steering, too much for a neophyte, like myself.

One of the many problems of building without a plan was that I did not have the 20mm hubs. When I thought I had all the steering figured out, found out that I had eaten too many tortillas the night before.


The axle bent, I will try to post pictures later, because they are on my phone and that thing is acting weird.

As soon as I get the new hubs, I will get on the chain and brakes business! But, because of the financial stuff, that will have to wait until next month.


Thank you all for such amazing community. I have just read a few threads, but y'all seem to know a LOT about what you're doing.  ~ Jose Franco

Chopper trike from Colombia, South America - AtomicZombie.com

My name again Arturo Borrero From Bogota Colombia South America.

This is my new trike based on the front fork of the spincycle but in the rear. I call it Old Skull trike.


Notice that the right hand of the skeleton is for the bottle, and the left one moves when you brake, waving hello. Thanks for continuing inspiring the builders hobby.


Awesome, Arturo! Looks like we have another young Atomic Zombie bike builder taking an interest, too.


Wednesday, July 21, 2010

Meet Atomic Zombie Krew members and bike builders - Nebraska

Forum name:  schu777   
Stats:  Married, 40-49       
Location:  Omaha, NE, USA   
Occupation:  Systems Analyst   
How found AZ:  Google   
When joined forum:  2009   
Bike building experience:  Newbie, no previous experience       
Welding experience:  Newbie, no previous experience           
Why joined AZ:  Like to build a trike for wife and me.           
Favorite type of bike:  Trikes   
Why? Neat looking, unique       
Past and present projects:  Trikes   
Welding:  MIG (Metal Inert Gas)   
Challenges:  Money, finding donor bikes
What it means to be part of AZ community:  Good info. source to get help in building the bike


This is a recent picture of me after finishing the BRAN (Bike Ride Across Nebraska) - 491 miles this year - supposedly the hardest one this year, too, according to a Vet of BRAN.   

Long wheel base recumbent from Pennsylvania - AtomicZombie

Another amazing homebuilt recumbent joins our growing builders gallery. Over 1,000 submissions so far. Keep up the great work, everybody!


Builder:  Albinini
Location:  Pittsburgh, PA

Tuesday, July 20, 2010

Lazarus-64 Retro Game build blog

From idea to prototype (continued)

I had no real idea how to carve a microcontroller into a retro game computer, so I started by making a list of what I would like to achieve in this project. Such things as video resolution, color space and memory bandwidth were worked out for the initial prototype, but some of the specifications had to be later changed due to constraints in the video timing and sync generation system. Knowing that a television set would be used as a video screen, a horizontal resolution of 224 pixels across was chosen, and although this was slightly beyond the "accepted" limits of composite video, it would be just fine for a game system. I initially wanted to have 256 horizontal pixels, but due to the way the sync generator worked on multiples of the 3.579 MHz color burst frequency, choices became limited to 160, 224, or 320. 

Having 320 horizontal pixels would have been nice, but then the host microcontroller would have to deal with a 9 bit X address and an 8 bit Y address, resulting in so many wasted cycles to compute the screen coordinates. The Commodore 64 could only push out 160 horizontal pixels in full 16 color mode, so my goal of 224 pixels with 256 colors was not bad as a comparison.

I continued to work out ideas and specifications on the notepad while taking shelter in the shade of a huge coral wall along the beach. The name "Lazarus-64" was penciled on the top of the notebook, and it seemed fitting considering the mythical character that rose from the dead. This project would basically revive the lost days of 8 bit computing using components that were actually available in the early 1980's such as 8 bit static RAM chips, 74 series logic gates, and a lot of tricky timing to carve out an NTSC signal. All of this retro hardware would then be "jacked" into modern 8 bit microcontroller that would basically act like a cartridge and CPU all in one.

A few months later when time allowed, I dug the Lazarus sketches out of my luggage and began to study the scary details of what it would take to actually generate a perfect NTSC signal to drive my video system out to a standard television screen. Some of my goals included not using any parts that were not available in 1980, so taking the easy way out by dropping in an NTSC video generator chip was not going to be an option. I dug deep into the old Atari documentation and NTSC specs, looking at what some of the old Jedi Masters such as Jay Miner (Atari 2600) did back in the days. At first, not much of this ancient data made much sense, but after some late nights the hairy details of the NTSC signal came into focus and I knew what it would take to make a color image on a television set.

To make a stable video image with the number of colors I wanted, it would take about a eight 74HC series logic chips just for the chroma phase generator, but that certainly fit with the project goals of only using true retro components. Now the next step was to decide on how the host microcontroller would talk to the video memory as this would ultimately determine how much "power" the final project would have. 

I decided very early in the prototyping phase that Lazarus-64 would squeeze as much bandwidth as possible out of the 70 nanosecond static RAM used as video memory, allowing the host microcontroller to read and write pixels at a blazing fast 14.318 MHz rate. 

This may seem slow compared to modern video hardware, but compared to the game systems and computers of the 1980s, this is at least 20 times as fast. The Nintendo 8 bit console could not even reach half a megahertz of video bandwidth. So began the creation of what I call "The Lazarus-64 Memory Switcher" - the circuitry that makes this project both easy to program and lighting fast.

After several months of trial and error as well as 200 or more hand drawn circuit diagrams, I had a design that would meet all of my original requirements. Since each small circuit was only partially tested on a small breadboard, the next step would be to breadboard the entire system to see if it would actually work.  

 Read more...

Dogs vs. recumbents

If I pass the same dogs more than a few times, I always get to know them. Stop, get off the bike and wait for them. If they fight, I fight, but generally they learn to know you and next time will just come by to say hello.

I have only had to become aggressive to a dog twice, and have made friends with many that seem aggressive at first. The chase is just a game.

Once on holidays, we even managed to capture a stray on a secluded beach that was chained around the neck with a sharp fence wire and hold him in place while we forced the chain off his neck. It was killing him as he grew. Everyone was afraid of this guy, but authority made him cooperate.

Once we are friends, on my next meeting, I will hand out some peperoni sticks.


They say dogs can read your attitude and I always think to myself,  "Come here, we will be friends, but nip at me and I will chase you to the ends of the earth and make you pay."  I have only had to fight back twice, and when you turn and run at a dog yelling, it scatters in fear since this is highly unusual behavior from a biped! I refuse to fear a 60 pound, 2 foot tall animal that has no fists or karate skills!!

Just like those "bullies" in school...one crack in the face and that it the last time you have to see them in your way.

But generally, they just want to say hi, and I do like most animals!

Brad

Monday, July 19, 2010

Meet Atomic Zombie krew members and bike builders


Name: Charles Mitchard
Forum name: Savarin
Stats: Married, 60-69
Location: Townsville, Queensland, Australia
Occupation: Lecturer in professional cookery
How you found AZ: Web search
When joined AZ forum: Ages ago on the old forum
Bike building experience: Some previous experience
Welding experience: A lot of previous experience
Why joined the AZ community: Looked like fun and a good crowd
Completed projects: Long wheel base recumbents
Favorite type of bike: I don't really have a "favorite" its just I've built two of them. I have two trikes in the pipeline.
Projects completed: Choppers, trikes, tall, trailers, long wheel base recumbents, short wheel base recumbents
Current projects: Long wheel base recumbents, trikes
Welding: MIG (Metal Inert Gas)
Challenges: Have not found anything difficult enough to call a challenge. Usually, the first idea worked. If it didn’t, I just stopped and thought some more.
What it means to be part of AZ community: An awesome place to learn and pass on more knowledge
Advice: Ya gotta practice and nothing is impossible if you put your mind to it.
More interesting stuff about you: I love building things and helping others. I'm an amateur astronomer and grind the glass to make my own telescopes. I’m currently working a 2" binocular (almost finished the design, have the glass ready to start, finished the grinding machine).


Sunday, July 18, 2010

Lazarus-64 Retro Game System - build blog

From idea to prototype

I can still remember the first time I touched the keyboard on a personal computer, watching in amazement as the glowing green screen relayed every character onto the rounded 14 inch glass monitor in front of me. "Syntax Error" was my first response from the 1978 Commodore PET, but it was the very beginning of what would become a life long journey.

While many kids were content to just play the crude games available for the monochrome 1 MHz 6502 based computer, I wanted to dig into the code and understand what went on inside the machine. For weeks I stayed up until the late hours, sitting under the green glow of the cathode ray tube, attempting to alter the source codes, often ending up with random results or a blank screen. Yes, this was the frontier of the hacking age, and I was there for the event horizon. Yah, I'm old!

Fast forward 30 years later, and here I am laying on a secluded Caribbean beach with more free time on my hands than I know what to do with. While some are happy to just shrivel up like raisins in the sun, half baked on Cuba-Libres, I was there with notepad in hand and a calculator melting in he sand beside me! Having just been introduced to the 8 bit microcontroller, I wondered how much of a task it would be to create some kind of retro 8 bit computer like the ones I enjoyed so much as a young nerd.


Although I had not yet done much beyond some simple compiled basic program on the PIC16F84, I had a good idea of how much could be done using assembly and some of the newer 20 MIPs microcontrollers offered by Microchip (PIC) and Atmel (AVR).

Sitting there with a blank notepad looking at the waves crashing against the coral reef it dawned on me that there was more power available in one of these five dollar microcontrollers than any of the 8 bit computers of the early 1980s. Ideas began to take shape on the canvas. Read more...


Saturday, July 17, 2010

UK short wheel base recumbent - Atomiczombie.com

Hi Atomic Zombie!

Please would it be possible to add my latest creation to the builders gallery?

It is a SWB recumbent with underseat steering called Project 2.


My name is dave voller and I am based in Merseyside in the UK. Great site!

~  Kindest regards, Dave Voller

No problem, Dave. The gallery will be updated this week. Nice recumbent!

Electric Recumbent by Tim: another successful bike build (AtomicZombie.com)

Hi AZ Krew.

Filled with confidence from the experience of building my first two Meridian recumbents, and armed with the superb information in the AZ books and friendly support from the forums, I decided to design and build an electrically assisted bicycle of my own.

This is what I came up with. I have learned a great deal about bicycle design thanks to Brad and Kat and all those good folks in the AZ krew and have enjoyed every moment of it. The bike was great fun to design and build. It rides great with good stability at all speeds thanks to the information on steering geometry on the website. The center of gravity is low which helps due to the low slung batteries. It weighs 30kg with batteries and is capable of 15 MPH without pedaling to comply with uk law, and has a 200W motor which again is a limitation of the law here.


Because of the crank forward design you can safely plant your feet on the floor while remaining seated and the riding positition is more comfortable and relaxed than an upright. It can accommodate riders from 5 foot to 6 foot 4 easilly and comfortably with only the seat being altered.

The whole experience has been great fun and most rewarding. I enjoyed designing and building it and my wife loves riding it. There will no doubt be some modifications and I intend to make a solar charging station for it in the garden. Until the next bike, be a happy zombie. All the very best to you all. ~ Tim

Very nice, Tim! Thanks for your kind words. Hope to see you again soon in the builders forum!  http://forum.atomiczombie.com .


Motorized StreetFox recumbent trike - Atomiczombie.com builder forum

Here are a few pictures of my just finished modified Streetfox. I built everything from scratch as I was having a hard time finding old bicycles suitable for what I was doing. I did not want a spring suspension on the back because I wanted it as solid as possible for the motor drive. The front end is built from scratch using automotive bearings because of the higher speeds I was going to be going.

It has the 32cc Golden Eagle Bike Engine and because it is more aerodynamic than a standard bicycle, the top speed on the flat is 48 MPH. The GBE engine has the Hi performance carb and the hi performance K&N air cleaner.

I have not painted it yet as I am still thinking about putting a velomobile body on it and the mounting points will need to be brazed on. The bike is brazed with no welding at any point.

My next tadpole will be TIG welded. Just to be different and also because I am going to build the bike to sell. OF course it will have a motor on it. It will also have Chrome molly tubing as this build is a bit heavy....but it really is not all that noticed even when I am just pedaling with the drive belt off. It really rolls well and straight.

The tires are Schwalbe Big Apple 26 inch rear and 20 inch front. They are like having a suspension on all three wheels. Amazing tires. The sidewalls with the reflective whitewalls are great at night. You can see me from the side a mile away.

I have a V brake on the back and front disk brakes. This thing stops on a dime and is very stable and straight when braking at speed.

The GEBE engine kit got me 170 MPG at 35 MPH on my other bike and I am getting over 190 MPG at over 40 MPH on this new build probably due to the improved aerodynamics.

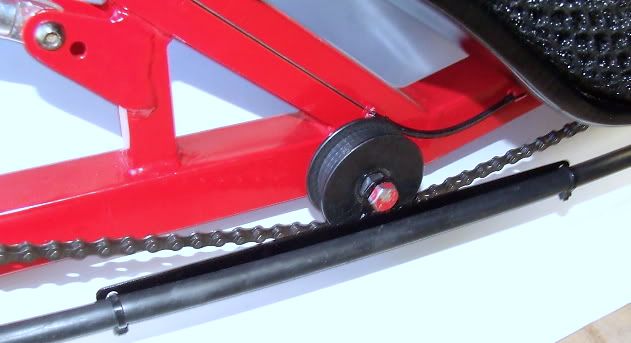
The red gas tank will be replaced with an aluminum 2 gallon spun tank that I am going to tig weld next week. The headrest is from a junked Honda and the seat is from an older recumbent I had. It is adjustable just as the pedals. I am going to replace the 3rd ring at the front with a larger unit because when at speed with the engine, I still like to pedal....and I want to go even faster!

When I ride it, I am always getting stares and when stopped I get a whole lot of questions.
I even have had a guy in a pickup truck follow me home and took some photos. I am probably the most photographed bike rider in Ohio right now. Constant photos from many many people. The local Harley Davidson riders sure love this thing too.

I rode it for over 4 hours today. I went over 100 miles..it would have been more but I was stopped by so many people asking questions about it.

After I get it painted and finished totally, then I am thinking about doing a two week road trip with it. Maybe a ride around the great lakes. I've been on a long road trip with a diamond frame bike and it was a pain...this thing is so comfortable. My next project will be a bike trailer so I can do some real traveling with it.

This bike is so smooth and really stable even at downhill speeds of over 55 MPH. I had my brother clock me going down this one road and on the flats I was doing 48 and down the hills at 62 MPH. It is fast for a trike and being so low, it really makes that speed seem even faster.

I've got to watch as the speed limit for a motor assist in Ohio is 20 MPH. When I see a cop, I have to slow down and start pedaling really fast to make it seem my pedaling was the thing that got me going so fast. That little 32 CC engine really moves this trike...and I'm getting fantastic gas mileage...I only used less than half a gallon to go that 100 miles.


Brazing is a very strong way of joining metal, and if you look at all the table saw blades that have carbide tipped teeth, they are brazed on the saw blade frame.

Brazing does not require the melting of the metals because the heat required to braze is less than the melting point of the metals to be joined. Crystallizing of the metal is not possible with brazing and so makes the brazed joint stronger in that the common point for welded joint failures is not the weld itself but the metal nearest the weld.

Brazing joins the metal together with capillary action. The metal sticks to the metal by having the brazing material fill into the pores in the metal.


You might be surprised to know that in some high end cars that are hand made, brazing is very commonly used to join metal. Also, gluing is commonly used to join metal in auto manufacturing. You would think that glued metal is not strong...but it is!

I have seen many high end bicycles made by professional frame builders and almost every one was brazed. I've never ever seen braze joint failure on one of these bikes after many many years of use.

I have learned a lot about welding and brazing from Lincoln Electric as I attended their school at their factory in Cleveland, Ohio. I like to mess around with metal and from what I have learned, brazing is a viable alternative to welding especially in bicycle construction. In many instances, it is the preferred method of joining metal.

I once thought that brazing was the weaker in the braze vs welding arguments. My instructor told me to braze some metal together and weld some metal together. Then by using a hydraulic device, test the welded vs brazed joint. To my surprise, the welded joint broke first not at the weld but at the point nearest the weld. The brazed joint failed at the exact joint...but it took longer to fail than the welded piece.

So from my experience, I have total confidence of a brazed frame and not afraid to go even faster than 40 with it. I just hope my tires don't fly off the rims going faster than 60 down a hill!

I own my tanks...they are not large ones so rental is not required. I bought my welding outfit at a pawn shop...got a great deal on it...I buy the uncoated bronze brazing rods and have a can of flux...so it is cheaper than buying the pre-fluxed rods.

Brazed joints can, depending on the joint design, withstand force of up to 69,000 lbs. per square inch. That is way more than the weight of me, the bike and any force applied to any of the joints on my trike.

Brazing is still used on production Formula car chassis in England. Also used on light aircraft frames. I think I am quite safe with my brazed modified StreetFox.

I have been a member of EAA (Experimental Aircraft Association) for many years and some, not all, of the aircraft I have seen built use silver braze to join the structural parts of the fuselage. Others such as the Dyke Delta, a homebuilt, used silver brazing for the wing rib structure.

The very same argument about brazing vs welding has been going on in the EAA for years. Silver brazing of chrome molly tubing is often preferred by some to tig because tig causes crystalization of the metal due to the fusion of the metal although in a very localized area. Brazing on the other hand, uses less heat over a wider area but the heat is not enough to transform the structure of the metal. Fusion welding has a habit of causing metal fatigue right next to the weld. Not so with brazing.

I have seen some restorations of aluminum framed aircraft that were aluminum brazed down at Wright Patterson aircraft museum. Some older aircraft frames were brazed due to not having tig because it was not invented yet.

The Boeing B-70 Valkarie Delta Bomber used brazing of the stainless steel and Titanium in many of its parts. Not sure if anything structural on that aircraft were brazed though. I am thinking that it was tig brazed or furnace brazed.

Today, structural brazing of aircraft is limited to high end processes of honeycomb construction as many of the parts of modern aircraft have been furnace brazed or tig brazed. From the numbers, brazing is strong enough to handle any of the stresses that we put on our bicycles.


Update:  Been riding around without paint for a couple of weeks...cables taped to the bike...not ready for prime time for sure..and it was bound to happen.

I had a flat tire and a rear derailleur go on me at the same time 10 miles from home. Never going to use a cheap used derailleur again! It was partially my fault as I had the derailleur adjusted wrong...but I wanted to ride and did not take the time to adjust it. It bent the derailleur mounting tab and elongated the hole...the derailleur bolt actually broke out of the tapped hole.

I had to take apart the bike and drive it home in the back of my Honda CRX. Decide because I had it apart it was time to finish it and paint it. Finished up the brazes and ground down the braze points. Fixed the bent rear derailleur mount by making a new one and tapping it.


Greased up all the steering bearings and wheel bearings. Thread locked all the bolts. Geesh there is a lot of things that need to be done before a bike can be road worthy. Spent about 6 hours today working on the bike.

I am using Rustoleum pickup truck bed paint. This stuff is awesome! Tough as nails but it takes a while for it to dry. I am using POR 15 prep liquid and so I do not need primer. After painting, let it sit for a day before putting it together! Pickup truck paint takes a while to dry.

Before all this, I was riding in the local Metroparks here in Cleveland and I had several people asking about the bike and the motor. I even got stopped by a cop who wanted me to build him a bike. I've had several women pull up to me as I was riding and took some photos with their cell phones. Women seem to love this thing. Guys like it too but I would rather talk to the ladies. Seeing how it was not painted, I was surprised that so many people asked where they could buy one.

Still have some assembly to do and am going to replace all the cables.

Read more of the motorized StreetFox build blog: http://atomic-zombie-extreme-machines.blogspot.com/2010/07/motorized-streetfox-recumbent-trike.html