
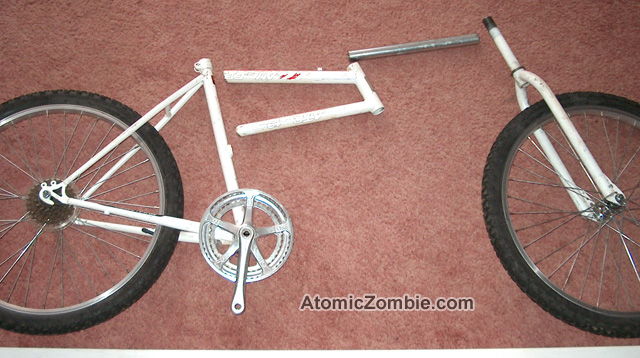
You can use practically any ordinary bicycle frame in order to build your own SideWinder, but this ladies frame shown here is optimal due to the placement of the top tube and down tube.

Start by chopping the frame as shown here at the end of the down tube where it meets the bottom bracket and at the end of the top tube where it meets the seat tube. Once you cut the tubing, use a sanding disc or hand file to remove any sharp leftover tubing at the bottom bracket and seat tube joint.
There are no strict measurements and angles when building the SideWinder, so you need to install your wheels and cranks to determine the position of the frame tubing based on the parts you are using. The goal is to build a frame that pivots just ahead of where you knee will reach its furthest when pedaling and to ensure that the pedals have about 3 inches of ground clearance just as they did on the original cycle.
As shown in this photo, the original head tube is relocated so that it is about 14 inches from the seat tube, at an angle very much the same as it was originally. This slight upward head tube angle helps the frame stay in the non-folded position when you want to ride it normally.
The other piece of tubing shown here will extend from the pivot to the head tube that will carry the front forks and handlebars. The front steering head tube is also placed at the same angle as on a regular bicycle, so both head tubes are at the same angle.

Weld the chopped front frame section back to the rear frame section as shown here, placing the head tube about 14 inches away from the seat tube at the same angle as it was on the original frame. If you are using a ladies bicycle frame like I am, then you don't have to alter the front section of the frame - just flip it upside-down and it will work perfectly. If you are using a standard diamond frame, then you need to cut one of the tubes so that the lower tube forms a 90 degree angle with the seat tube as shown here. Of course, none of these measurements are absolutely critical, so feel free to experiment.

To create a frame that can smoothly fold in half in the center, we will utilize the original fork stem since it already fits perfectly in the head tube. Cut the fork legs from the fork stem right at the crown area and then clean up the leftover metal with a grinding disc. Find a 14 inch long piece of frame tubing or conduit and then weld it at 90 degrees to the fork stem at the crown area where you just removed the fork legs.
At the other end of this tube, you will install another head tube that will carry your front forks and handlebars. As shown in the photo, both the fork stem and the new head tube will form a 90 degree angle with this new tube. The size of the new head tube is not important as long as it fits the front forks you intend to use.

One thing to note is that you will not be able to remove any of the swingarm fork hardware once this welding is done, so clean and grease your bearings and install all of the hardware properly before welding this tube into place. These tubes can be recycled from another frame or you can use thin walled electrical conduit like I did.
Part 2 in tomorrow's blog.
